Writing with Light & the MN eLearning Summit 2016

Writing with Light & the MN eLearning Summit 2016

In late July, I attended and presented at the Minnesota eLearning Summit 2016 at the Minneapolis Community and Technical College. My presentation, Writing with Light: Building A Low-Cost Lightboard at Carleton College, was selected as a session. I’ve embedded a screencast of it below, as well as on YouTube. Here’s how my conference went, as a story in annotated tweets…

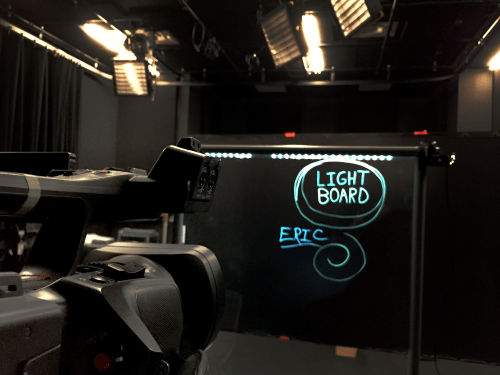
I was selected as one of the speakers for the summit and chose to speak on the Lightboard, which we designed and built at Carleton College. Our Lightboard is notable for its very low cost and ease of use. 

It was thrilling to see Randy Bass speak again. He came to Carleton last fall and gave an engaging and thrilling set of talks, inspiring us to think about the future of education and our roles within it.

One of the big questions we need to ask ourselves while thinking about education and the choices we make.


People panic about the changes in education that are happening and will happen, but that panic is often unwarranted.

Summarizing a complex concept in a tweet is tough!

The power of scale as it affects technology and education cannot be underestimated. We can use this scale to great advantage. We must also be careful of how scale can overwhelm.

My excitement went into overdrive went Dr. Bass started talking about ePortfolios. This is an area of intense interest for me. Dr. Bass had some very interesting data on ePortfolios.

Most impressive was the correlation between use of an ePortfolio and retention. It seems like students who use the ePortfolios to reflect on their work and themselves take more away from lessons.

Finally, Dr. Bass ended with an appeal to have every course teach three things: knowledge of the Domain, knowledge of the World, and Knowledge of Oneself. These three overlap to create an transformative learning experience.

Then it was time for the Lightboard! I had an engaged group who really enjoyed getting the details on how our Lightboard functions and playing with the scale model I brought with me.

This is the small-scale Lightboard I brought with me!


Here is a screencast of my presentation. Tweet at @EricMistry if you have any questions!

Next I attended a fantastic talk on various ways to use Google apps, such as docs and forms, to enhance the classroom experience. Wendy gave an engaging, well-organized presentation.

This was one of the many tricks and tips she shared. See more from her full presentation by clicking here.

This was really interesting. The team from U of M had some useful advice for dealing with video creation and editing at scale…

Next, I saw a short presentation on informed course design. This was very interesting as they emphasized the need for teams to be comprised of diverse perspectives in order to better meet learners.

Next was a look at the future of LMSs.

The stages of the LMS are pretty interesting. I’m not sure where they’ll go next, but it could be anywhere.

There is big money in the LMS sector. It’s impressive to think about and we should be pretty thoughtful about why so much money is funnelling towards it.

This was a great visual representation. Canvas is definitely a company to watch.

This was a very moving line from one of the introductions to the next keynote.

Dr. Marie Norman gave a really great talk on taking lessons learned from designing online courses and translating that to all teaching.

You have to love a talk that comes with an awesome reading list!

Often, straight-up lecture is not the best way to convey information. This is especially true for online classes, but we can take ideas of working around this and apply it to the classroom as well.

Scavenger learning is a useful concept that we can apply everywhere. Like with clickers, the important thing is asking well-designed questions.

Creating and sharing resources is a major component of online learning and teaching. We can take that culture and bring it to the traditional classroom.

Design is important, no matter where or how you are teaching.

Learning doesn’t exist in a vacuum. We need to think and teach accordingly.

This is a great thing for instructors to remember. Different students learn in different ways. If you engage them on all fronts, they’ll have a better chance of retaining knowledge.

I enjoyed talking more ePortfolios with Hamline’s team and other educators. It was helpful to talk problems and strategies to solve them.

…and then we were done! This was a great conference. I met and interacted with some passionate educators and other academic technologists. There are so many impressive and incredible things happening in this space. It makes me excited for the future of education.


Building the Carleton Lightboard

Building the Carleton Lightboard

Every day of my Carleton job has been a new adventure. I get opportunities to work on creative, innovative projects that I get to run fairly autonomously. In this post, I’ll be talking about the Lightboard.
Lightboard
The Lightboard was one of the first projects I was assigned to during my starting week at Carleton. I was given the following problem: research other Lightboards around the country, and try to figure out how to make ours work well. Before we delve into solving the problem, I should probably answer the most obvious question: what is a Lightboard?
A lightboard is, in essence, a clear whiteboard. The instructor stands on one side of it and writes on it with a fluorescent marker. A camera is on the other side that captures the writing that glows on the screen. The footage is then flipped, cropped, and edited for color and lighting. We end up with footage that captures not only what the instructors are writing, but also their full expressions and face, rather than their back or hands.
LightboardLayout
This is our basic Lightboard setup (This was pre-wiring of the Lightboard)
The original Lightboard was developed at Northwestern by Michael Peshkin, a professor of Physics. His site not only shows his (very sophisticated) Lightboard build, but collects build instructions and documentation from Lightboards at schools around the world. This was extremely helpful in figuring out how to solve our own issues with the Lightboard.
With that brief introduction, back to the problem at hand. We already had a frame with plexiglass installed, but it was nearly impossible to capture what was being written on the board, and the audio was also muffled. The audio problem was relatively easy to solve; we simply attach a wireless lavolier microphone to the presenter, and the audio streams directly to the camera, instead of having to go through the plexiglass. Solving the visual issues was a bit more of a process. First of all, the plexiglass was extremely reflective, and our first attempts often captured more of the camera than the presenter. Second, if the presenter was well-lit enough to see, it meant that any writing was impossible to see. This was what an early test looked like.

Idea 1: Adding lights to the board surface.

First, I attempted to add better lighting to the  outside of board. This was simple enough. I had bought some simple IKEA lights [link] to install in my apartment bookshelves, and figured they might help light the surface of the board, as they were relatively flat and easy to place where I wanted. I stuck them on the front of the plexiglass and angled them down, hoping that it would help make both the markers and the presenter more visible. It did help, but not in the right way. Even with fluorescent markers, the writing was barely distinguishable.
Next, I tried adding blacklights to the board. My reasoning was that backlights help things glow, and that it would really boost the intensity of the fluorescent markers. Spoiler alert: It didn’t work. Even with the blacklight, the markers barely glowed. At this point, it became pretty clear that attaching any manner of lights to the surface of the board was not going to work.

Idea 2: Installing lights directly to the side of the plexiglass.

After studying the documentation and other builds more closely, I decided to test what happened when I added lights directly on the edge of plexiglass. I borrowed a spare piece of plexiglass and attached the lights on the edge facing inward. The entire piece glowed as the plexiglass conducted the light from edge to edge. I mounted that piece onto our existing board and did a side by side comparison. The difference, as you can see in the videos below, is very apparent.
With the difference made clear, I got permission from Ben at St. Olaf to physically modify the board so I could install the lighting properly on the top edge of the unit. I removed the top piece and a few support pieces and began to get to work. I lucked out and found that this board had a grove that would perfectly fit the IKEA lights. I installed the lights, remounted the top piece, and added a power strip to the board’s base. The change in quality was fantastic.

Better lighting and editing

With the board now effectively lit, I got to focus on lighting and editing the footage. With lighting, I’ve found that placing a light on both sides of the board to gently light the presenter works quite well. It can’t be too focused, or it creates jarring dramatic shadows. It also can’t be too diffuse, or the board begins to have reflection issues. We also shoot in an otherwise dark studio, with a black background behind the presenter. We use a polarizing filter on our tripod-mounted camera to further reduce reflections, and also cover the red “recording” light with painters tape to ensure it does not reflect on the board.
After we’ve shot the footage, it goes through a brief editing process. I use Adobe Premiere to edit, but the necessary changes would likely be possible on less expensive or free software. I start by color correcting the video, then super-saturating the specific blue of the marker we use to make it extra-visible on the final product. I then apply mirror image filter (called horizontal flip in Premiere) so the writing is facing the proper way, and crop and scale the video so that we only see the board, and not any of the lights or frame. The video is then exported and sent to the presenter for their class or presentations.
We’ve had some really interesting uses so far, even in this initial experimental stage. One of my favorites has been Japanese symbol lessons developed by visiting Professor Miaki Habuka. She has her TA go over the  symbols that students in her Intermediate Japanese class need to learn. By using the Lightboard, her students are able to see each stroke of the symbols as they are written, which is an important component in understanding how to properly write in Japanese. Check out the video below to see an example of one of the language lessons. This is just one of the many uses for the Lightboard, and we’re looking forward to many more amazing projects to come.
This is just the beginning of the Lightboard. In later posts, I’m planning to write a more in-depth guide to our specific build with pricing, instructions, and advice. I’ll also continue to show more examples of finished videos and additional modifications or builds.